Pages

Featured Post

What Was I Thinking!!

 I have been at this a long time! 20 years in fact. I have had a lot of fun over the years and had my share of recognition when this medium ...

Showing posts with label challenge. Show all posts

ArtBeads ‘What’s Old is New Again!’ Blogger Challenge

Hey, remember this?


BS-0038 6x8mm Dark Amber and Opaque Sky Blue with Picasso Roundel Bead Strand *

SW-BD245 Stoneware Brown with Light Blue Daisies Tube Bead *

LMP-0146 Yellow and Orange Roundel Beads (7 pcs) *

CR-RL131 5x4mm Opaline Yellow Roundelle Strand *

I got a great selection of fun items from ArtBeads for their 'What's Old is New Again' challenge. I got the new beads from Artbeads and am using an blue glass necklace of my mom's as the old.

I found these earrings that I had picked up last year when I was in St. Louis visiting my daughter from a thrift store and added them to the mix last minute.


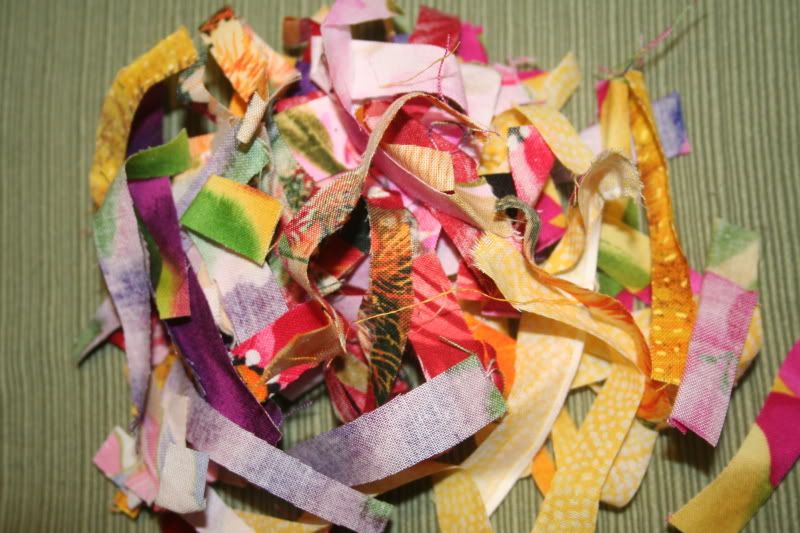
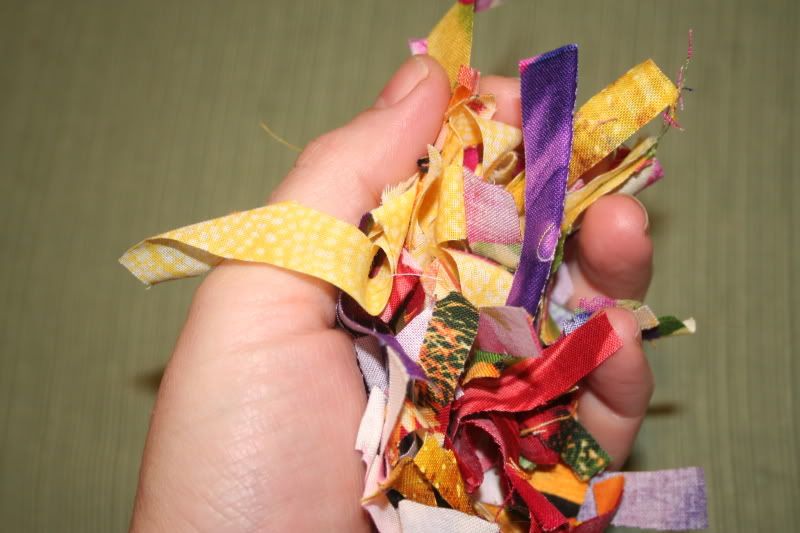
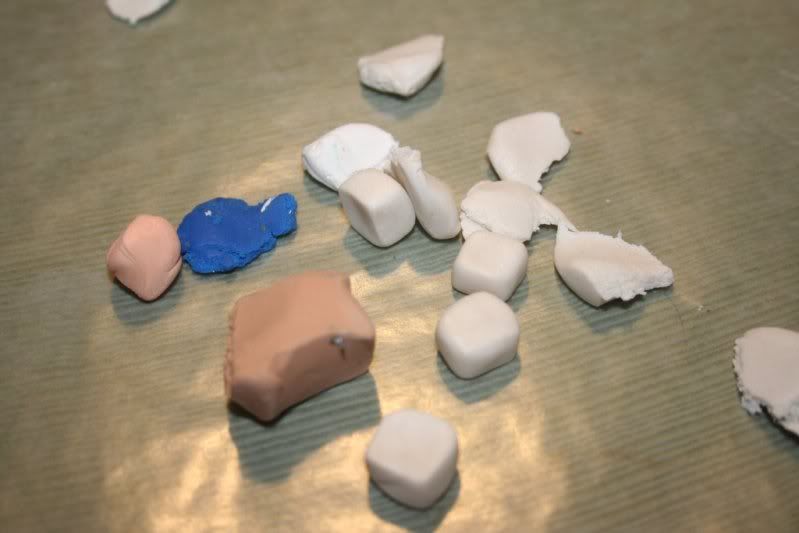
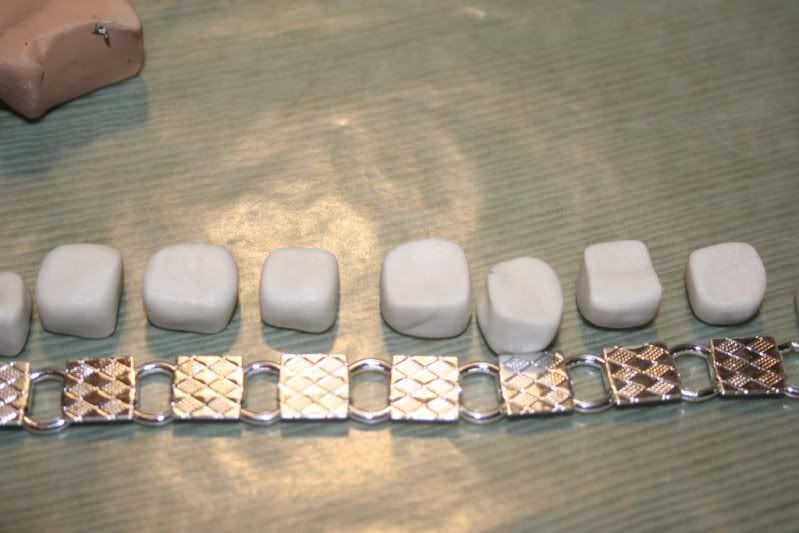
I was really aprehensive about popping that necklace apart, but I finally did it! Here is the 'mess' of inspiration!


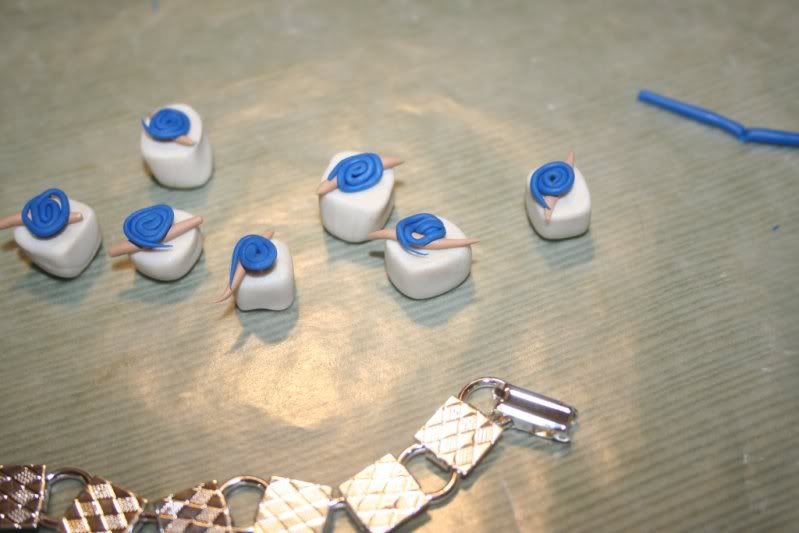
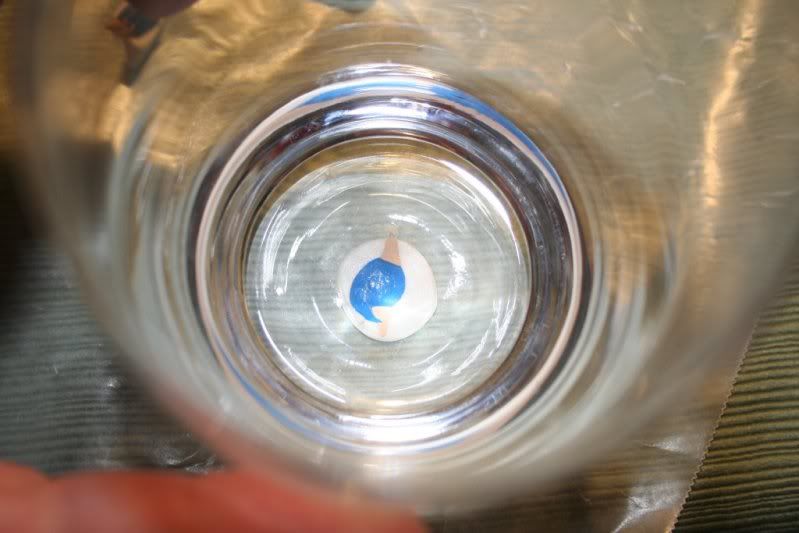
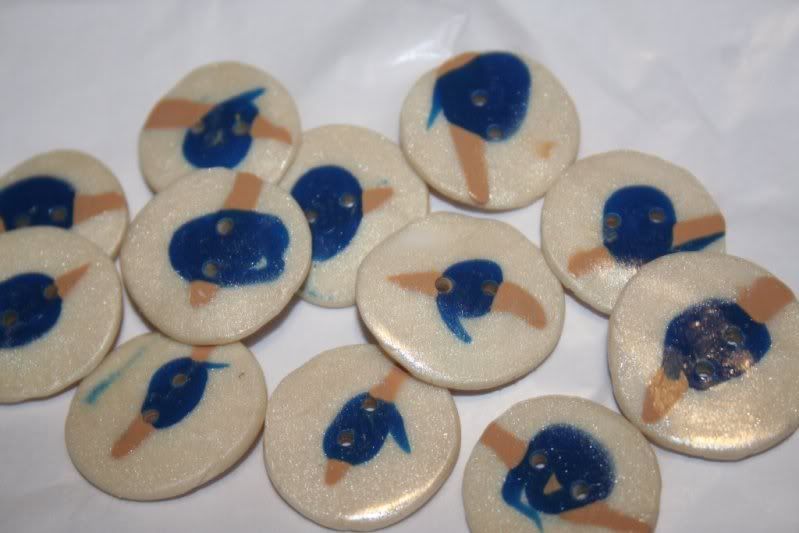
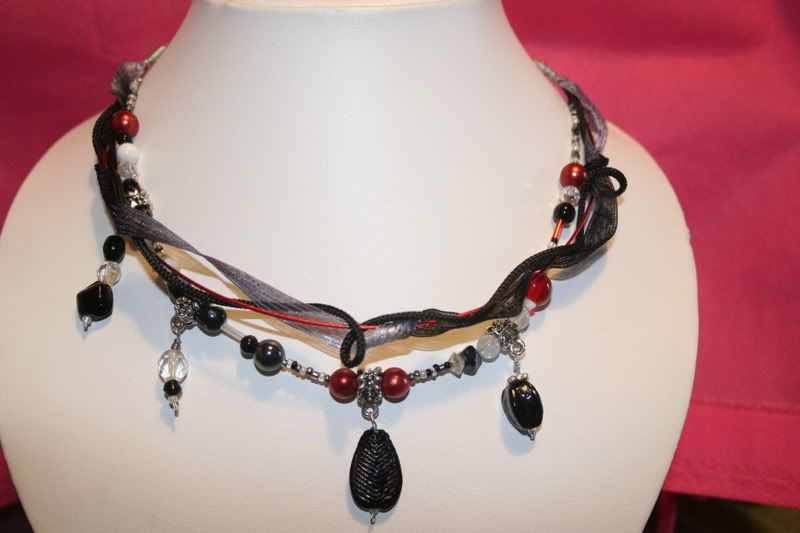
Let me tell you how much fun I had with this challenge. All of these colors are so bright and cheery, I didn't want to stop this morning!

Are these adorable or what!!!!! I can't help but smile when I see them.


Fun and bright, simply knotted hemp necklace. This is casual, but with an attitude :) It flirts with a tshirt and says "I dare you" with a plunged neck sundress - can you wear it?


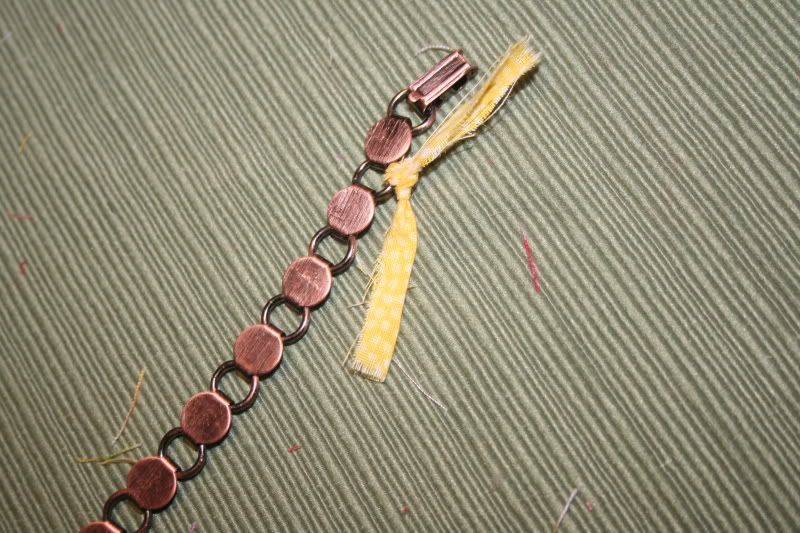
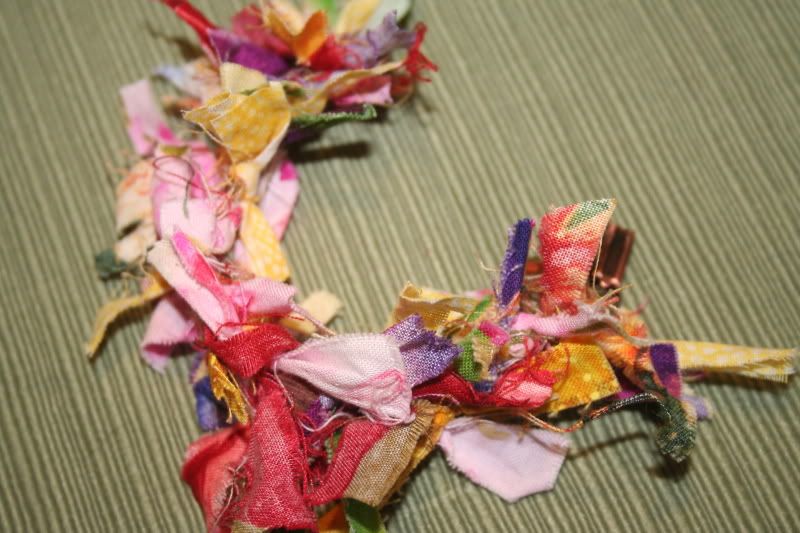
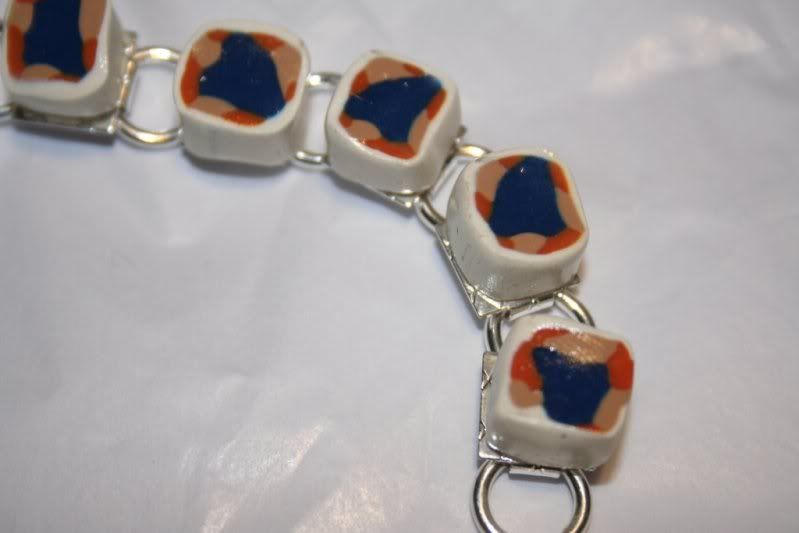
and to complete the perfect summer ensemble, a bold and chunky bracelet.


I am not done!! I have more coming tomorrow!


What would you have made?


Want to see more creations inspired by the What's Old is New Again challenge? Check out ArtBeads Facebook page!!

*FTC compliance disclosure: the '*' items mentioned in this post credited to Art Beads were provided as a promotional gift as part of the Blogging for Beaders Program. These items are for review or design purposes.

The Year of Jewelry Project 2011

Have you heard of the newest project? The Year of Jewelry Project 2011 - "One piece per week, for a year".

This is a fun site/blog that challenges jewelry artists to create one piece of jewelry a week and post it on this group blog.

Weekly themes are provided to help with any creative block, or you can come up with your own.

I signed up and am waiting for my log in information. I am really excited about participating. You can come play too!!! Here is what you need to know about Getting Started.

Please note that to participate in the first quarter of this year, you can sign up through January 7 - there is still 2 more days!!! The next signup period is March 19-25, 2011.

Stop by and see the blog, and bookmark it. It could be fun to stop by once a week or so and see all the new designs.


Hope to see you there!!!

Stringing Magazine Challenge - I'm In!!

I am sooo excited!

I submitted my piece Hello Tiffany to the Stringing Magazine 'Lets Go To The Movies' Challenge and I got accepted!


Voting is going on til Sept 3, 2010

Vote for your favorite today!!!

Weekend challenge

I was fussing about this morning doing my chores and stumbled across some old -'stashes' of mind. I have a soft spot for boxes. I love them - LOVE THEM! i have a tendency to tuck things away in them, thinking i will remember and use them on another day.

Today I found these:


Gonna see what fun I can make this weekend!

Glue-able Challenge 4 & 5 - FINALLY

Like a lot of my designs, they come to me when I sleep. I guess it is because I go to bed mulling over the events of the day, and starting my mental calendar for the next.

I woke up this morning and began to tear up the house looking for odds and ends to start this creation. There is nothing more frustrating than when I have an idea, and I can't find the parts. I hate waiting because I have to run out to the store. I want it now!

I have collected odds and ends to try and make this happen. All these things where to be displayed on the Brass Square Frame from Rings & Things - Stock #49-441-0
Old watch, confetti, filigree, tissue paper, and printed old photos found cruising Creative Commons. (if ya don't know what it is, check it out - too much fun)


I took the watch apart and used the gears - That was so much fun!!


Grabbed my trustie Mod Podge and started in. Put a thin layer of Mod Podge on the the Brass Square Frame. Cut a piece of tissue paper to fit inside the frame and applied it to the glue.


Cut out the picture, to look like a cameo of sorts, and glue it onto the tissue paper.


Decide what you want to go around the picture. I cut a piece of confetti in half to represent a broken heart. Then I placed the insides of the watch around the picture to represent time. I added some filigree for a fun touch. Did a thin layer of the glue on top

There you have it - Time Heals A Broken Heart.


And now for something completely different!!


OMG! I LOVE THIS! - I was bad, and I didn't glue, I konw it was a 'glue-able' theme, but I have had this idea bumping around for over a week, and I had to get it out. I took a bunch of bright fun fabric and cut it into strips - bout 2 1/2".


Now ball up the strips and roll them around in your palms like you are making a ball. This will stress the fabric and make it crumbled and frayed.


Tie the pieces onto the links of the bracelet. Two per side of the link.


And when it is finished you have a fuzzy, wild colored, soft, fun bracelet! I am thinking about sewing on some crystals to give it some shine.


I am wearing it today - dont' look at my hairy arms you will give me a complex.....

Glue-able challenge - 2 & 3

Here is a real serious attempt at the polymer clay and the glueable bracelet from Ring & Things.

I wanted to try and do something with a mill-ee-fee-your-ee style. I wanted to play with the idea and get a feel for how it is done.

I didn't document this one. This is my first attempt at the millefiori technique with polymer clay.
I created the pieces with the sculpty clay, baked them and finished them with a spray can of hi gloss.

I made a blue 'log' about 2" log and 1/2" in diameter. Then rolled out thinner 'logs' of brown and orange, and pressed them around the log. Then I flattened a piece of white and wrapped it around the 'log'. I compacted the log with my hand to make the design tight, and then rolled it lightly back and forth on the table to lengthen the log. Then I sliced it up, and pressed the pieces a little more with my fingertips to make them a bit more square. After baking them, I gave them a quick shot of hi gloss, and here ya go!

I used part number Stock#: 40-367-1


When I see gold I think of christmas and I think of those Brach's nougats...the peppermint ones. Dave from Rings & Things made a comment about making valentines type insult candy - So I went with a candy theme. I dug around and found a few more scraps of polymer clay. Using the same technique as before, I made an attempt at making a christmassy type candy style adornment to glue to the gold bracelet.

I used part number - Stock#: 40-349-2


This has been fun, and I am rolling with more ideas!

Thanks Dave!

Glue-ale challenge - attempt - FAIL

My brother and sister in law have been in town for several days so I am behind on my challenges - I apologize

BUT I AM BACK!

I was going to be clever and document the process and share with you - in case it was brilliant. Now I will make myself vulnerable, and show you the documentation of the thought process, and the intent. Be gentle :)

Thinking on the side of brilliance, I was going to glue on little polymer clay pieces. Could be cute, could be colorful, and fun designs. I thought because I am working in a new area - with the glue-able, I would also try and work some with the polymer clay. I have been wanting to do some stuff with that anyways. First I wanted to try making just some patterned squares.

So...

I didn't have much of a selection left over. The clay is always the hit when my g/f comes over with her kids. They play with it all nite. Here are a few scraps I had.


I made them into squares bout the size of the metal glue pad. I went about this all wrong, as an after thought, but I am secure enuff in myself to share :)


Made designs with spirals and straight pieces.


Here is where I thougth I was being clever - i was going to mash them flat, and the shape them to fit on the glue pad..


After I mashed them, I realized they were too big, and I was only going to have blue squares on the bracelet instead of the fun design.

*think* *think*

BUTTONS!!! I will make them into buttons!!! - This is my depressed Duck line.


This attempt altho failed, was a fun learning expierence, and I have some fun buttons.

March Rings and Things Challenge - attempt........

I won't say epic fail, but I will say I am not satisfied with the glue. It left a cloudy look, instead of clear. Is like looking out a dirty window into your garden. *sigh* I don't do windows.......

I was going for a garden, flowery field abstract look.

I used the Brass Rectangle Frame - #49-440-0 for this attempt.


Using my trusty hammer - I crushed, amethyst, peridot and colored glass beads. Then I put a thin layer of Quick Grip glue on the frame - I will never use it again - and positioned the crushed pieces to try and create a picture. I added seed beads here and there and a flower shell. After the glue dried, I put on a thin layer of Mod Podge (I thought I was being clever) and added more crushed stones for a deeper look. I added one more layer of Mod Podge after that layer dried to seal it.

I thought Mod Podge was suppose to dry clear, but I thought wrong.

Here is a close up of the frame,now a pendant


I couldn't leave well enuff alone, so I continued on and used that as a focal for a necklace. I used a filigree bead cap, and mashed it around the eye of the frame to hide it and give it a bit more flare.

I call it Imperial Garden - because it was a royal pain in my Aster - ehehehe I am so punny....


And here is the finished product


Saftey Tip

Do Not Rush The Glue

REPEAT!

DO NOT RUSH THE GLUE!!


It Will Own YOU!!!

That is all

Some Rings and Things love

I got my blogger outreach package from Rings & Things today!!!!!
I came running down the drive way, waving the package in the air, screaming "The new phone books are here!! The new phone books are here!! I am somebody!!!" (i am referencing what movie?!?!?!)

I ripped into it, like a kid on Christmas morning, I couldn't wait to see what the challenge was -
And Challenge It IS!!!!!

Is a glueable theme, and I am ready to start!

And there were stickers included!!! Just like Cracker Jacks!!!
(one is already on my truck)
THANKS DAVE!!!!

Rings & Things Choker Challenge - 5

I really have had the best time with this challenge. I want to thank Dave at Rings and Things for approaching me with their blogger outreach. It has pushed me into new areas of design that I though were not possible. I can't believe how much it has helped me grow in thought process, and design mechanics in such a short time - Thanks again!!!

I have had this idea rolling around in my head for several days. This morning I sat down to try and bring it out. I documented the process so you could see how it is done.

Used in this challenge:
Rings & Things part number #52-030-18-05 - Choker, Cable, 18" SmoothEnd (Red/White)

This choker cable has a barrel screw clasp - very exciting. That allows me to create a bigger bolder design and be confident that the clasp will stay secure. I went through my craft room and gathered up some random goodness of black/red/gray/white. Piled it on the kitchen table and began to create. I used a base metal wire - approx 26 ga from the looks of it - cut a good length for wrapping - 4 inches - and made a wire wrapped loop at the end.


Cut a lenght of ribbon and cording to attach to the cable - 12 inches or so each. Pinch the ribbon and cord onto the cable and secure it with your fingers. Use the wire wrapped loop as the base of the wrap, and start wrapping up the cable. Keep your wraps close and tight.


Give the wrap a bit of a 'mash' to help tighten it up.


Do an 'over and under' around the cable with the ribbon and cord. It doesn't have to be perfect.


Secure the other end with the same wrapping style that you used to start it.

Begin stringing your design. Keep the design random an fun. This will be the focal of this piece. The beaded section should hang at the same level as the choker cable. It will be heavy and want to drape, don't make it too long. Beadalon is the beading wire I used for this example. Use a crimp bead and attach the beading wire to the wire wrapped loop at the base of the wrap that was used to secure the ribbon and cable. Run the tail of the beading wire back thru the beads to help anchor it, and then trim the excess.


In the search for some fun beads, I had some pewter spacer beads that have charm links attached to them. I also added them randomly thru the design to add charms to the look.


Cut a 2" piece of the wire, and fold the end back onto itself to create a head pin.

Decorate the head pin with your beads and make a bend at the top to push thru the charm loop on your spacer bead.

Finish with a basic wrap to secure the charm to the link.


Here ya have it kids - The finished product. I intentionelly put it off center - that is how I see the world :)

Ya Ya


Choker Challenge - 4

This piece is made of lampwork beads with a dyed howlite focal wrapped onto the choker. The color of the choker inspired the dyed howlite focal. I love the barrel screw connector on this choker which allowed me to take a simple but bolder approach wiht the heavier beads.

This is the invenotry number from Rings and Things :

#52-030-18-24 Choker, Cable, 18" SmoothEnd (Turquoise/White)

choker challenge

Choker cable challenge

Chapter two. Bola Faux

I thought it would be fun to create an illustion of a bola (also known as a bolo) tie. I brought the ends of the leather together, made a pinch loop at the bend in the middle, and pushed the tails through the loop, attaching it to the cable. I then made a basic wire loop and attached it to the leather. This gives the look of the bola. Finally, I added embelishments to the ends and a turqoise teardrop. No self respecting bola can be without turquoise!

One thing I would recommend, if you are using heavy stones for the focal, use the choker cable that has the barrel screw connector instead of the magnetic. The magnectic connectors are very conveinent, but cannot support a lot of weight.

Rings and Things inventory number for the cable used in this piece is:
#52-52-090-20-1 Choker, Magnet, Cable, 1mm, 20"


This is a fun piece to wear with a scoop neck tee.

choker challenge

Or under the collar of your button-down shirt for that true bola look.

choker challenge

To be continued......

The Challenge is Set!

I love a good challenge, and thanks to Rings and Things , I have one.

This is an ongoing project, so make sure to use the RSS feed at the left of the page so you don't miss out on any of the newest design updates!

Challenge 1: Choker cables.

The choker cables in these images have magnetic clasps. The clasp feels to be secure, but I think with a heavy pendant I would worry about it coming free. I like the idea of the barrel screw clasp better.

First thought with a choker cable is pendant. I love the cable, it holds its shape - unlike a chain or leather thong that drapes to the weight of the pendant. With a crew neck or scoop neck t-shirt, these cables keep the focus of the pendant up at your neck line. Truly fabulous. I have tons of pendants because I am a pendant wearer. I normally have them on a leather thong and in different links, depending on the type of shirt i am wearing. I also have a tendency to wear a shorter style necklace - and the choker cable is a great fit for that. (I feel a change coming on.) The clasp is small enough the bale slides over it easily giving me so much versatility. All I have to do is decide which pendant for which mood! I am impressed at the cable for keeping it shape with four pendants hanging from it!

pendants on choker cable

Pictured in this image - #52-000-15-9 Choker, Steel, Cable, 1mm, 15" (Black/White Clasp)

"That is too easy, TIsh!" I hear you say and, yes, I agree. What fun is a challenge if the outcome is predictable?

What can I do to create something different, w/o just sliding beads onto the cable?

*think* *think* *think*

I poked through my box of "glorious randomness" and found these fun vintage Czech glass beads. I chose these as the focal using an eye pin to secure them to the choker cable. The cable does slide around some, and it works the clasp toward the front. I wanted the design more stable, so I wrapped a copper wire around the cable and threaded on amethyst chips for an acent.

Here is the first, of five.

Restless Wend

choker challenge

Pictured in this image - #52-001-18-9 Choker, Steel, Cable, 1mm, 18" (Black/Gold Clasp)

Am wearing this one today, and have already been complimented!

proof in da puddin
To be continued......
Update cookies preferences