
I have had this idea rolling around in my head for several days. This morning I sat down to try and bring it out. I documented the process so you could see how it is done.
Used in this challenge:
Rings & Things part number #52-030-18-05 - Choker, Cable, 18" SmoothEnd (Red/White)
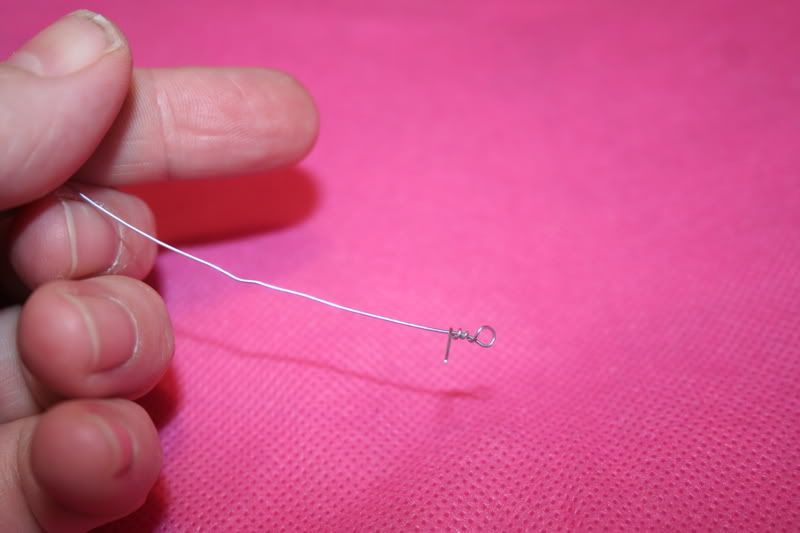
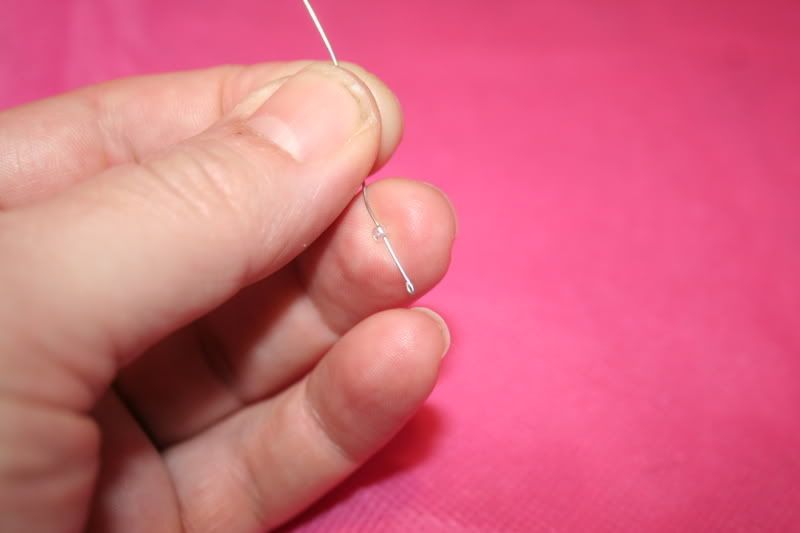
This choker cable has a barrel screw clasp - very exciting. That allows me to create a bigger bolder design and be confident that the clasp will stay secure. I went through my craft room and gathered up some random goodness of black/red/gray/white. Piled it on the kitchen table and began to create. I used a base metal wire - approx 26 ga from the looks of it - cut a good length for wrapping - 4 inches - and made a wire wrapped loop at the end.
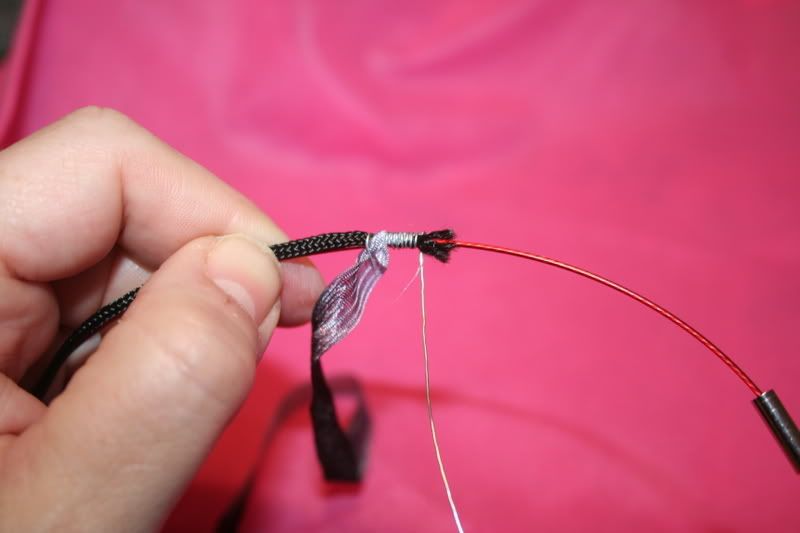
Cut a lenght of ribbon and cording to attach to the cable - 12 inches or so each. Pinch the ribbon and cord onto the cable and secure it with your fingers. Use the wire wrapped loop as the base of the wrap, and start wrapping up the cable. Keep your wraps close and tight.

Give the wrap a bit of a 'mash' to help tighten it up.

Do an 'over and under' around the cable with the ribbon and cord. It doesn't have to be perfect.
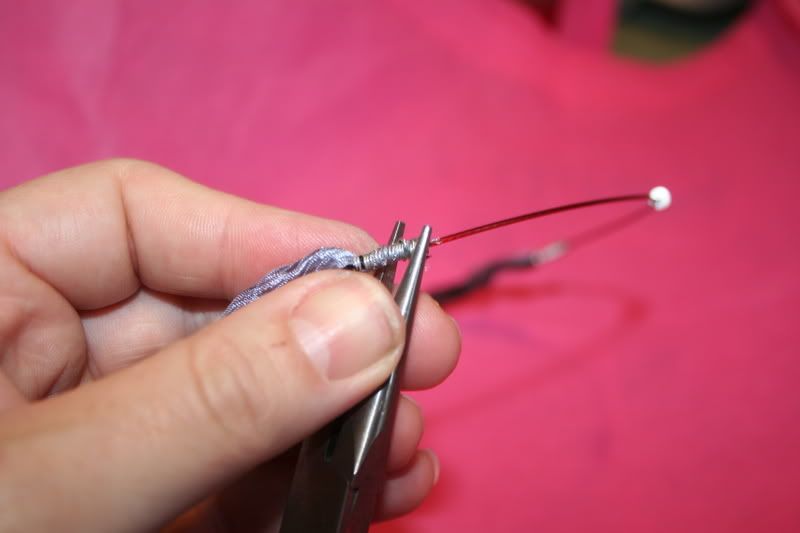
 Secure the other end with the same wrapping style that you used to start it.
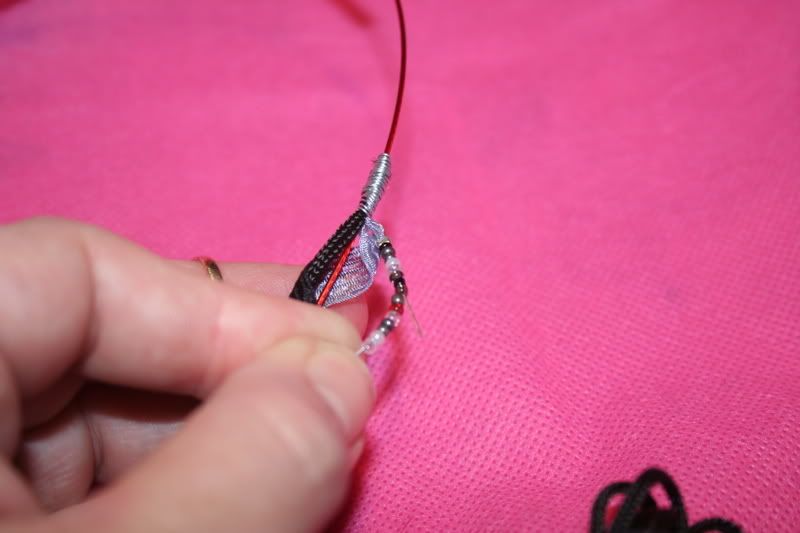 Begin stringing your design. Keep the design random an fun. This will be the focal of this piece. The beaded section should hang at the same level as the choker cable. It will be heavy and want to drape, don't make it too long. Beadalon is the beading wire I used for this example. Use a crimp bead and attach the beading wire to the wire wrapped loop at the base of the wrap that was used to secure the ribbon and cable. Run the tail of the beading wire back thru the beads to help anchor it, and then trim the excess.
In the search for some fun beads, I had some pewter spacer beads that have charm links attached to them. I also added them randomly thru the design to add charms to the look.
Cut a 2" piece of the wire, and fold the end back onto itself to create a head pin.
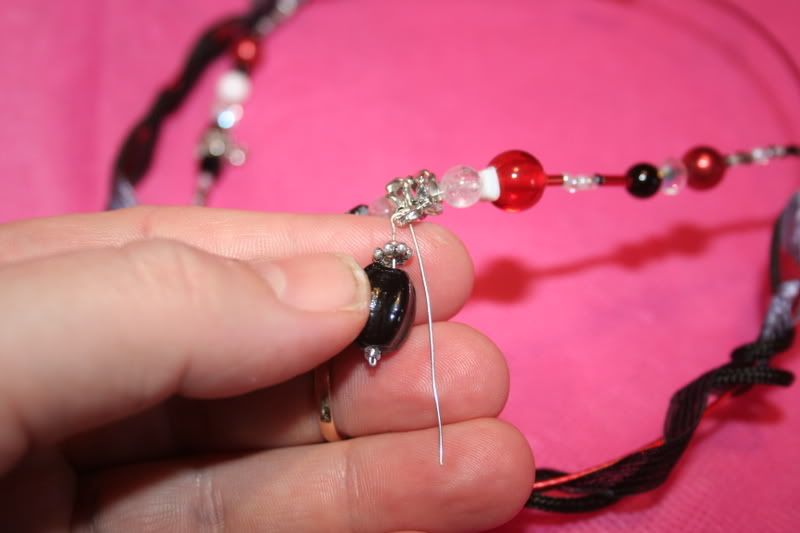 Decorate the head pin with your beads and make a bend at the top to push thru the charm loop on your spacer bead.
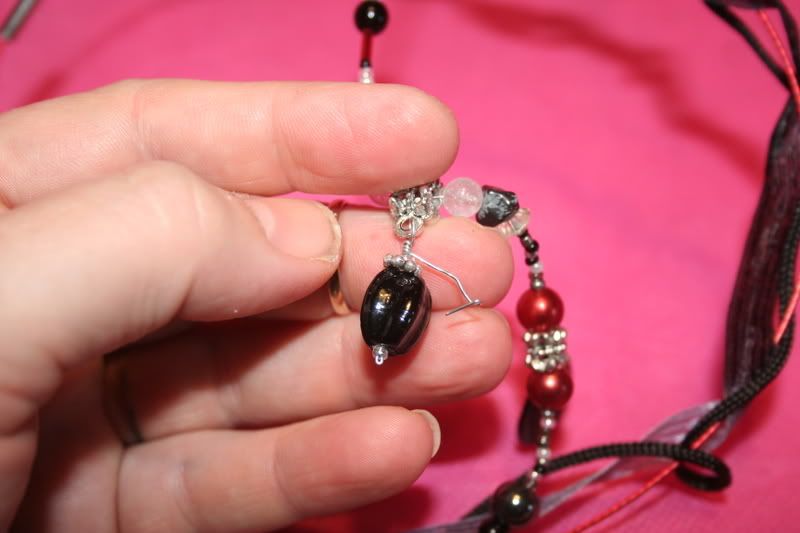 Finish with a basic wrap to secure the charm to the link.
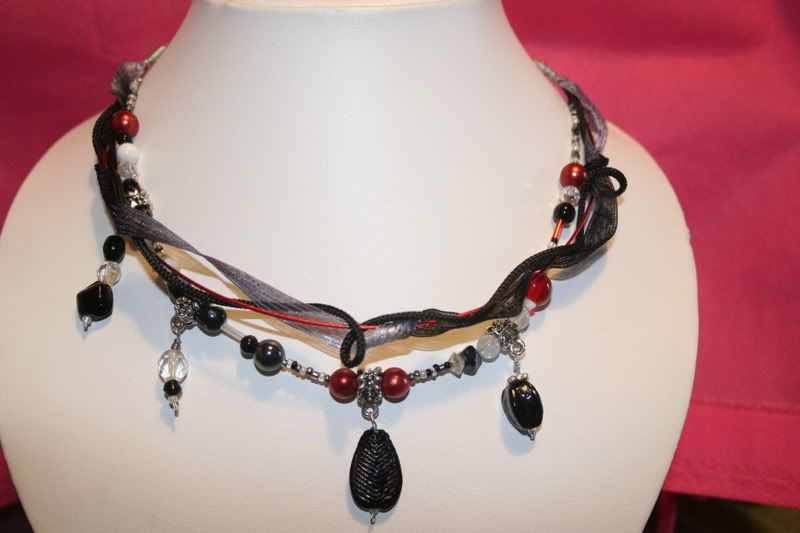
Here ya have it kids - The finished product. I intentionelly put it off center - that is how I see the world :)
Ya Ya
Oh Wow. Just Wow. It's not just a necklace, it's art. I really appreciate the detailed post with the close up pictures. Thank you so much for sharing (and the encouraging comments on my blog, too).
ReplyDeleteThis has been great (Thanks Dave!) for understanding all the things you can do with those simple little cable forms. To think that just a week ago I couldn't think of *anything* to do!
*beams* you don't know what you just did for me Dawno - Thank you so much for the comment.
ReplyDeleteI wanted to share how I made it in detail, because the piece seems so busy - and really it wasn't.
it's an illusion!! MAGIK!!!!
Wow, that's awesome, I agree with Dawno, a work of art!!
ReplyDeleteThanks Lisa!
ReplyDelete